Precision Ring Work
In this area we'll demonstrate how to do precision ring work. Whether you're doing simple rings or multiple complex rings, the proceedure is the same.
While there are other methods of performing this work we believe our method produces the best results. This method produces rings without glue lines and when you spin the cue, the rings will spin true instead of wobbling like many production cues. Our method takes a lot longer but the results are worth the time. So, take your time, have patience, take a break in between and the results will be perfection. Remember, you're not out to win a race!
We'd also like to point out that what we're showing here is doing advanced ring work for flawless looking rings. There are other methods but we like this one the best. We do hope you appreciate the time that we put into doing all these and the many hours of trial, error and expense that they will save you.
Sanding The Rings

The first thing you need to do is get all your rings together and decide what you are going to use. Put them in the same order as you plan on installing them. Why? Becasue I'm anal and that's the way we do it.
Next item is never assume anything. If you buy phenolic rings (or anything for that matter) which are made by someone else, never assume anything. In fact, assume that they are always wrong and your work will benefit as a result. So, in-other-words always true-up anything you are about to use.
Get all your rings and sand one side on a belt sander bed. You do not do this under power. You can use any flat surface with sand paper glued down but be sure it's flat. Just sand in round motions until the surface is evenly sanded. This means to remove all shiny areas. We place all the sanded sides face down and then bring them over to our work piece.
Cutting The Tenon


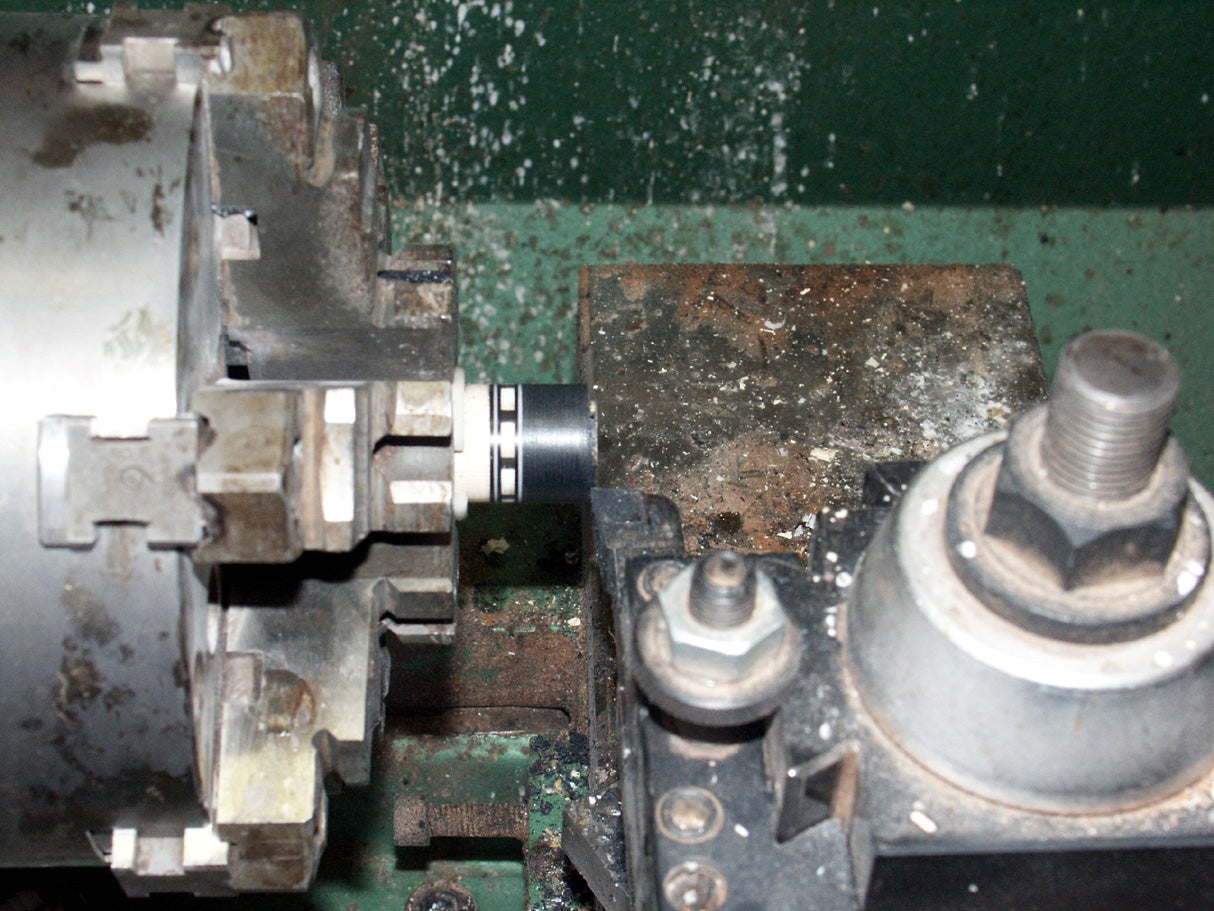
You'll need to cut a tenon to .625. Do it between centers to insure a perfect tenon and a real good face-off. If this face is not true, by the time you get to the last ring, the inaccuracy will be very noticable. Do it right!
See inset photo --- As you're facing off between centers, you want to also sand the end near the face at the same time (do not sand the face). This insures a real clean and sharp edge and it removes all the little fibers as a result of facing.
Deburring

You'll want to deburr your rings to remove excess debris and make them fit easier. Don't remove too much material as you want a snug fit but not a tight fit. Bob asked me to mention that those are his hands.
Deburring #2

You can deburr phonelic, wood and an other material with this home made tool. It's a 1" counter sink glued into a handle. You need to deburr all materials to remove any possibility of resistance at the inner wall. This does a great job of doing that. Face off your work piece and sand as is show elsewhere in this series, then deburr.
Facing Between Centers

Now, you may not need to do every face off between centers but for the extra 5 seconds it takes to move the tail stock up to the work piece, we do it. When you're working so close to the chuck, you probably don't need to use it but like I said, for the 5 seconds it's added insurance. All cutting and facing off should be done between centers for accuracy especially when cutting tenons.
Facing Each Ring

Now, this is the anal part of doing ring work. Most cue makers sand both sides of the ring and then install them. We use to do it that way and it works fine. You sand both surfaces real good, use epoxy and then slide them on, line them and wait for the epoxy (use West) to set.
However, we only sand one side on all the rings and then glue one on using Thin Cyanoacrylate. The Cyano dries quickly and we then face that ring off. The face off barely removes any material but that's just enough. Then you glue the sanded surface of the next ring onto the faced off side of the previous ring. And so on, and so on. We've found that this process creates flawless ring work.
Caution: When using Cyano, you do not have any room for error. You have to be familiar with using it and good at doing it this way. It may take some practice but we think it's the way to go for flawless rings and no glue lines.
The above method of doing ring work is probably the best method around and remember where you read it as we appreciate the words of praise from so many of you. That's why we keep this series going and constantly add to it.
Facing and Sanding Together

When we cut the tenon and face it off, we also like to sand the higher wood as well. Anytime we do a face off of this type, we also sand. You can also sand each ring but it's more difficult as the rings are super thin and so you have to sand the edge on an angle as long as you don't sand the face. This makes a nice clean and sharp edge. It makes a difference and removes any micro fibers that may be present.
The sanding blocks are available at Lowes or Home Depot. We love them as they're really convenient.
Huh, not a bad picture; sanding with my left and taking the picture with my right. I can also walk and chew gum at the same time. :-)
Share