The Forearm - Start To Finish
Here we show a picture gallery of how the forearm is built with detailed explanation.
The first step is to pick out veneers; the colors and how many. Once we have determined those choices, we then glue them up as is shown in the next photo.
Glued Up Veneers

Ok, now you're saying, this is all great info but what glue can you use to glue up the veneers. Actually, you can use just about anything. You can use white glue, Cyanoacrylate, West System and our own Finishing Epoxy. So which is best? Well, the Cyanoacrylate will dry super fast; the West takes about 24 hours for a full cure and our Finishing Epoxy will dry in about 20-40 minutes. Now, depending on your patience level and how fast you want to use them determines which to use. So, the Cyano is too fast and West is too slow. So, guess which is best. You can use the thin Cyano to glue up the veneers to a 45 degree angle and West to glue in the point wood.
Once we have picked out our veneer choices, we then decide what order they need to be in. We apply glue to each layer and place the other color on top. Once this set is complete we wrap it. When all the sets are done, they are then placed in our veneer press for a full 24 hours. We then take them out and we have perfectly glued and most importantly, flat sets of veneers. The veneer sets are then run through our special veneer saw which cuts a perfect 90 degree angle. The veneers are then glued at a perfect 90 degree angle. Once they dry (24 hours later) we then glue in the center wood and that is allowed to dry another 24 hours. What you then have is the next photo.
Ok, now you're saying, this is all great info but what glue can you use to glue up the veneers. Actually, you can use just about anything. You can use white glue, Cyanoacrylate, West System and our own Finishing Epoxy. So which is best? Well, the Cyanoacrylate will dry super fast; the West takes about 24 hours for a full cure and our Finishing Epoxy will dry in about 20-40 minutes. Now, depending on your patience level and how fast you want to use them determines which to use. So, the Cyano is too fast and West is too slow. So, guess which is best. You can use the thin Cyano to glue up the veneers to a 45 degree angle and West to glue in the point wood. You can use Medium Cyano to glue in the point wood but there is no room for error and once you place it in; it's in there for good.
Please Note: When we say 24 hours, this is the minimum allowed drying time; we sometimes allow more time depending on current temperature, moisture, etc. and our mood. :-)
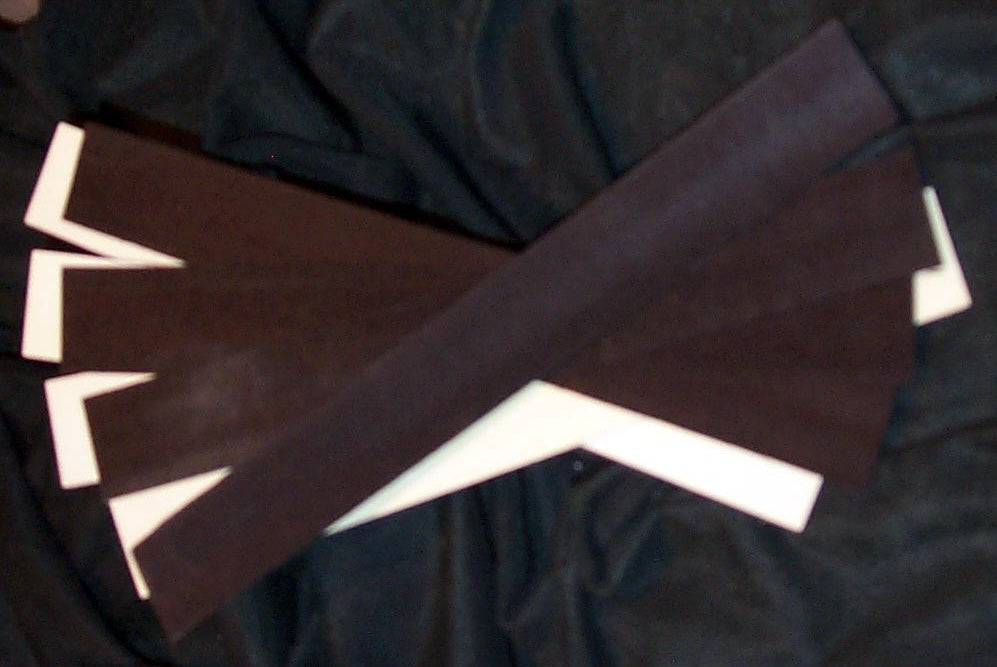
The Veneers Glued Up

The veneers have been glued at a perfect 90 degree angle. We then choose our wood inlay which is the main point wood (ivory, whatever) and glue that in. That is then allowed to dry at least another 24 hours and what you see here is that finished product. You'll note how the veneers are all perfectly matched up with no space or glue lines. This is the perfection we achieve and it is of the utmost importance for structural integrity.
The following is a repeat from the preceeding page:
Ok, now you're saying, this is all great info but what glue can you use to glue up the veneers. Actually, you can use just about anything. You can use white glue, Cyanoacrylate, West System and our own Finishing Epoxy. So which is best? Well, the Cyanoacrylate will dry super fast; the West takes about 24 hours for a full cure and our Finishing Epoxy will dry in about 20-40 minutes. Now, depending on your patience level and how fast you want to use them determines which to use. So, the Cyano is too fast and West is too slow. So, guess which is best. You can use the thin Cyano to glue up the veneers to a 45 degree angle and West to glue in the point wood.
The Forearm

We then choose a front or forearm that we'd like to use or that a client ordered. The piece is turned down and is about 30 - 50 thousandths (+-) over in size which is what you see here. It is reduced in size from a square to this size over a period of months by incrementally reducing it in size every 2-4 weeks (+-). The wood must rest in order to remain happy. We need to keep the wood happy.
Cutting A Tenon

Once we have our forearm choice we then need to cut a tenon. This tenon is cut in several passes over a period of about 30-45 days. You cannot take it down in one pass; well, you can if you like but if your points run off or you have other problems, you'll know why. This is our method and there are many other methods but this works for us.
Cutting In The Points

Now that we have the tenon cut it is placed in our milling machine. You'll note now why we needed the tenon. This particular front will have 4 points so we index it at 0, 90, 180 and 270 degrees precise spacing.
Cutting Points In Action

This photo basically shows you how the points are cut and what they look like. You need speeds in excess of 3000 rpm (higher is better) and a very sharp cutting tool to achieve clean, sharp and accurate 90 degree "V" grooves.
Clued Up Forearm

This photo shows the actual points glued into the forearm which is then wrapped in a specially coated paper (yes it's wax paper but a certain type) and then tightly banded to insure no spaces and a tight fit. This is allowed to dry for a minimum of 48 hours and sometimes longer. 24 to 48 is usually sufficient when using West System.
Forearm Rough With Points Glued In

Pretty isn't it!? Well, actually it really is. This piece was taken out of the wrap and this is what you end up with, We then take it over to the bandsaw and cut off the excess material close to the actual forearm wood but staying a safe distance and taking the final passes on the tapering lathe.
Turning The Forearm

Here we show the actual forearm being cut in the tapering lathe. It is taken down to approximately the forearm wood while barely taking a pass on the forearm itself. What we want to achieve here is to remove all the excess point wood while still remaining over-sized.
The Forearm - Turned And Finished (Almost)

And, here is the finished product after taking it out of the lathe with the tenon still attached. You'll note how perfect, even, neat and clean the points are. You too can achieve this perfection by taking your time in every step of the construction process. Taking your time and being patient is the key.
Cutting The Tenant Off

Well, at this point we no longer need the tenon so... off it comes right down to the points. It is then carefully faced off several times to ensure a clean and smooth surface. Take notice how close to the chuck we perform our work. The closer you work the more accurate your work. This does not mean to work up against the chuck; leave yourself room for error. A lathe is a dangerous and unforgiving machine; always wear eye protection and keep your fingers clear of the chuck.
You'll also note how the glued up points form a perfect 'cross' and you can see how the points are perfectly matched to the 90 degree "V" groove. All this careful craftsmanship pays off in the finished product. Again, patience, patience, patience.
Note: If you have points, it is best to tap into the handle (forearm into handle).
Center Drilling The Forearm

This is our final proceedure in crafting the forearm before the next stage. Here we are taking a 60 degree center drill to mark the center once again before cutting the tenon and and tapping for the screw (bolt, or whatever you want to call it and whatever you decide to use). Everything is always done between centers.
Share